
Enhancing an Urban Development Proposal using ArcGIS Pro and Online.
Over the past summer, I had the opportunity to take part in a field course offered by the School of Earth, Environment & Society here at McMaster. This course was an exploration of urban environments and the processes at play within the city of Toronto. We spent three days exploring different neighborhoods and projects within the city to understand the motivations and support behind them. While there are several tasks that we had to complete as part of this course, the major culmination was a development proposal.
At the intersection of Church St and Bond St, behind Nathan Phillips Square, is a partially vacant property that is a prime development location. Our task was to consider the social, environmental, and physical aspects of the immediate and surrounding neighbourhood and propose a new development for the site. As part of the required deliverables was a proposal poster that depicted a model of our ideas. For this part, I was able to use my knowledge of Esri’s products and add depth to the proposal.

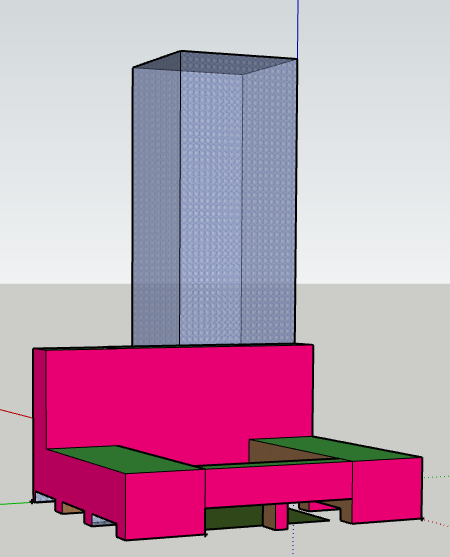
Like many of my other classmates, I started off with using SketchUp Pro to design a model of the development we were going to propose. SketchUp allows you to build 3D models as a way of communicating your vision for the proposal. This was a complicated but important step that was going to show the design, features, and directions of the building design. As per the assignment’s requirement, this was all that was needed, but to provide more context to the space I decided that it was important to bring it into ArcGIS Pro as a 3D model.
Steps taken to bring SketchUp model into ArcGIS Pro
To start off with, you will need to convert your model into a type that can be imported into Pro. Here are the steps you need to follow to do that:
- Drag a box, using your mouse, around the entire model and right click.
- Then you will choose Make Component and add a unique name.
- Press Create.
Hint: Ensure that the Replace Selection with Component Box is ticked.
- Go to File, select Export and then 3D Model. This will save it as a KML layer.
Now that you have the model ready to be imported, open a new project within ArcGIS Pro. Next, follow these steps:
- Go to Add Data and add the KML layer that you previously created.
- Next, open the Geoprocessing tab and search KML to Layer.
- Import the KML file and run the tool.
- Right click on your new model and go to Preferences.
- Then go to Elevation and change the elevation to On the Ground if it isn’t already.
- Go to the Layer 3D to Feature Class tool and input the multipatch model. Run the tool.
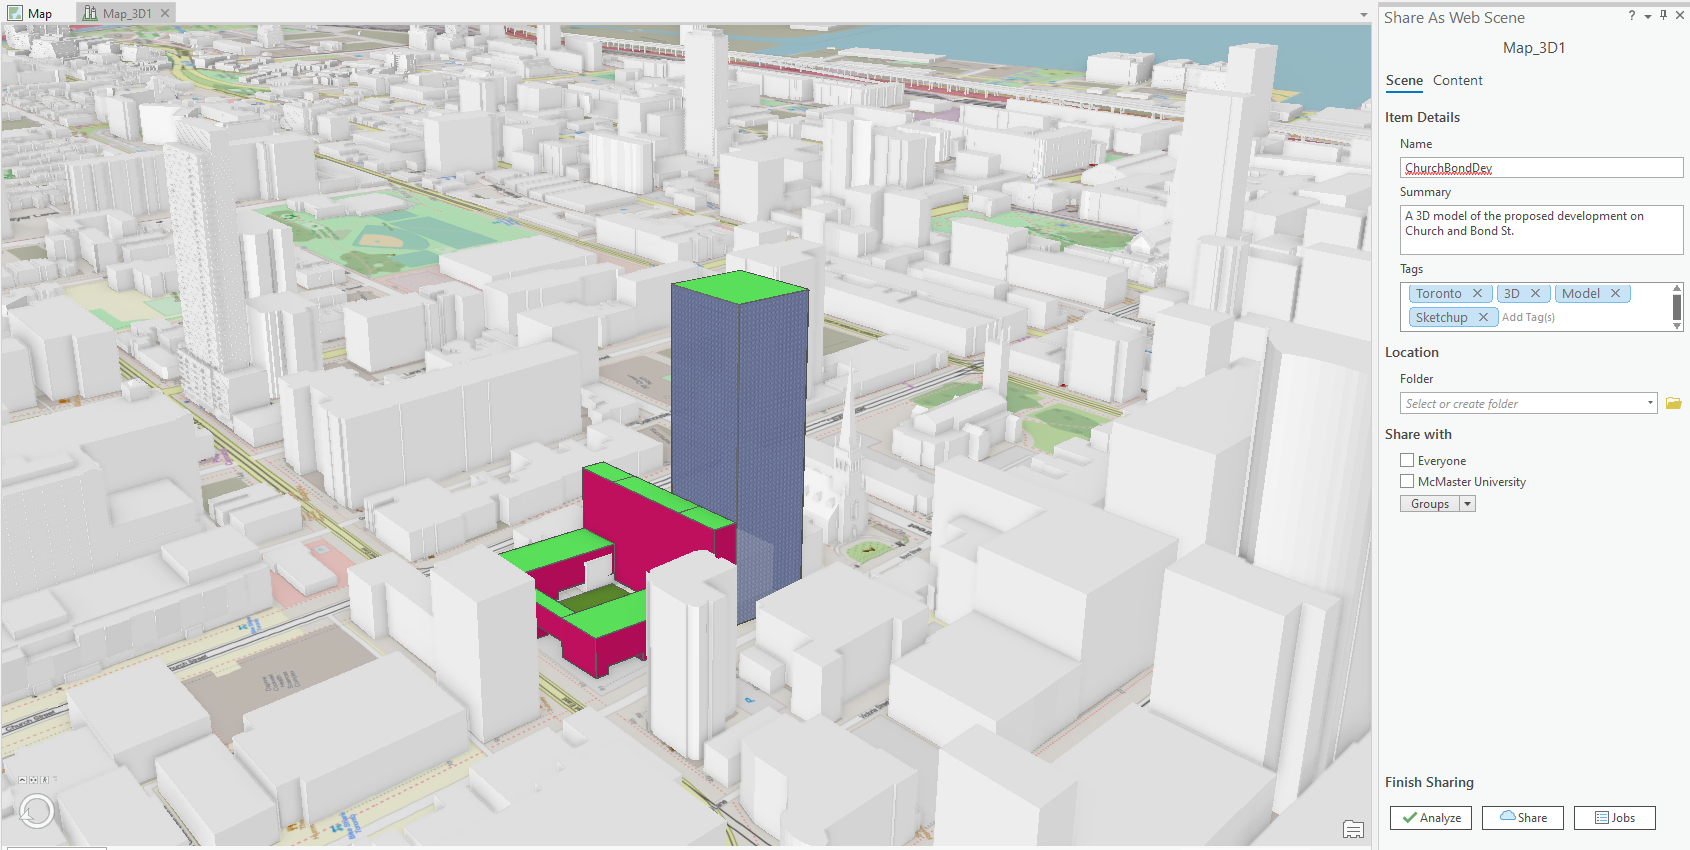
To provide more context to the building I then added 3D models of the buildings within the City of Toronto. It is important to do this because it gives users the ability to compare what the proposal will look like in the real world context. Open Data Portals are a great resource provided by Esri because they allow for users like myself to get access to the work that cities like Toronto may be doing and to add actual real world content into my projects. However, this does not have to be limited to only academic settings, and in fact, we can use open data in various areas including professional industries. Here are the steps to follow for doing that:
- Go to Add Data, click on ArcGIS Online under Portal.
- Here search for an open data layer that may be provided by a source like the City of Toronto.
- Click on the layer and it will be added to your scene.
Going from ArcGIS Pro to an Instant App
At this point, I had a model that could be published to ArcGIS Online and viewed as a scene. Here are the steps to do that:
- Go to the Share tab and click Web Scene under Share As.
- Set sharing properties like Name, Summary, Tags and Sharing Level.
- Click Share.
- Access the contents within your ArcGIS Online account.
- Click on your layer and it will open it in a Scene.
Now that I had a scene with my model I was able to use it as part of the poster that we had to present. However, to add more user interaction within my deliverable, I decided to go a step further and create a web app for my model. Here are the steps to do that:
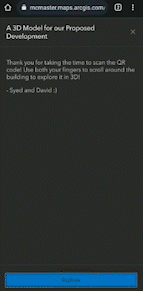
- On your scene’s Overview page, click the Create Web App Button, and choose Instant Apps. (Here you may choose other options, but for the sake of this project I decide to go with a pre-set template)
- On the Create App page choose 3D Viewer.
- Choose a name for the app and add tags.
- Within the options on the left hand side click on All Settings and then Continue when the pop-up comes up.
- Click on About, and then App Details. Here you can enable an introduction panel and then click on the edit button to add information you want to display when the app is opened.
- Press the Publish button.
- Go back to the Content page and change the Sharing Level to Everyone (public).

Now I had an app that I shared through a QR code which allowed any person looking at my proposal poster to visualize a 3D model on their phone. Although this assignment had no real-world implications, the workflow I followed for this app showed how useful Esri products can be for adding depth to development proposals. I was able to migrate a project from a completely different program to Pro to make it more easily accessible and interactive. While ArcGIS Urban is perhaps a more urban context-specific tool that allows for development visualization as part of its wide array of tools, the workflow I used is another useful option for anyone looking for alternatives. Overall, I look forward to using ArcGIS Online’s Web Scenes and Instant Apps within my assignments in planning school next year.